Installing Wordpress 2.9.x on an IIS 6.0 web server (Windows Server 2003) and enabling custom permalinks
January 18, 2010
A few clients I’ve worked with in the past are Microsoft-centric having Server 2003 based dedicated servers but want to be able to host Wordpress blogs. Luckily it’s relatively straightforward to get a Wordpress blog up and running on IIS by the following steps.
This is written for Server 2003 (running IIS 6.0) and I’m using a virgin Server 2003 SP2 install. First we’ll configure IIS so it can run PHP scripts, and then configure Wordpress appropriately. 7QS2A4HU29PC
Note: that these are basic steps to get Wordpress running on a development machine and not for staging/launch, thus you should check out detailed security notes on Wordpress/mySQL and IIS to harden up security before exposing the blog to the public interwebs.
1. Enable running of PHP scripts
- Ensure one of your server roles is as an Application Server which will provide access to IIS (otherwise FastCGI will complain…)
- Install FastCGI from http://www.iis.net/expand/fastcgi (I’m using the latest release version and not the 1.5 RC)
- Then, install PHP for Windows, which you can get at http://windows.php.net/download (currently version 5.3.1). I selected the ‘non-thread safe version’, as recommended by http://learn.iis.net/page.aspx/247/using-fastcgi-to-host-php-applications-on-iis-60 (section entitled ‘Download and Install PHP’)
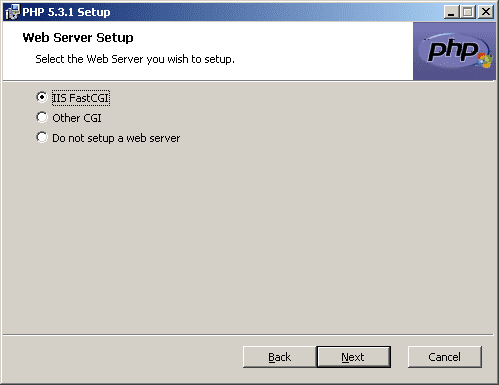
- Part of the PHP installation process will ask you what web server you are using. Select ‘IIS FastCGI’ and it will associate the FastCGI ISAPI filter with IIS , meaning you can skip the section ‘Configuring FastCGI Extension to Work with PHP’ on the iis link above. Feel free customise the install path or default PHP extensions to be installed.

- That’s PHP installed: To test it has been successful, create a folder and add a file
index.phpto it (I put this underC:\phpwebs\phpinfo), and copy the following code into it:
<?php phpinfo(); ?>
- Now go into the IIS Manager in administrative tools, and under Websites/Default Web Site, create a new virtual directory. Give it a name (e.g. phpinfo) and select the folder you created, ticking Read and Execute permissions.
- Open up a browser and navigate to
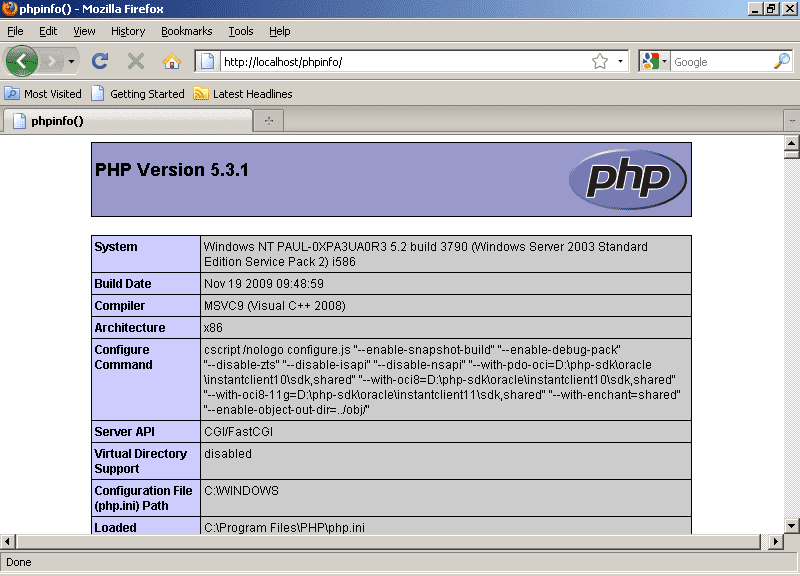
http://localhost/phpinfo. You should see the classic PHPInfo screen with the Server API down as CGI/FastCGI.
You may also want to check out the section entitled ‘Setting FastCGI Configuration for Optimal Functionality, Security and Performance with PHP’ at http://learn.iis.net/page.aspx/247/using-fastcgi-to-host-php-applications-on-iis-60.
2. Installing and configuring Wordpress 2.9.x
Now IIS can run PHP scripts you can now grab the latest version of Wordpress from http://wordpress.org/download/ and unzip the contents of the folder to your root for PHP web applications (i’ll keep using
C:\phpwebs). In my case I’ll be usingC:\phpwebs\wordpress. Make sure you persist the Wordpress folder structure whilst unzipping.I won’t recommend a database technology but in this case I’ll be using mysql which you can get at http://dev.mysql.com/downloads/mysql/ (currently MySQL Community Server 5.1.42). I went for a typical install, and a ‘standard configuration’ in the MySQL Instance Configuration Wizard. I left the default options checked, and created a new, strong root password. When its ready, click Execute to update the MySQL configuration and start the mySQL service.
I then created a new database entitled
wordpress, a user entitledwordpressand granted thewordpressuser ownership permissions on thewordpresstable. (You can do this via the mysql command line tool, or via my favorite db admin tool, phpmyadmin). e.g. (note for production you should use something a little more secure)CREATE DATABASE wordpress; CREATE USER ‘wordpress’@‘localhost’ IDENTIFIED BY ‘pass123’; GRANT SELECT,INSERT,UPDATE,DELETE,CREATE,DROP ON wordpress.* TO ‘wordpress’@‘localhost’;
Now we need to rename wp-config-sample.php to wp-config.php and edit the file, specifically the following fields
/** The name of the database for WordPress */ define(‘DB_NAME’, ‘wordpress’);
/** MySQL database username */ define(‘DB_USER’, ‘wordpress’);
/** MySQL database password */ define(‘DB_PASSWORD’, ‘pass123’);
Now in the same way we added
phpinfoas a virtual directory within the IIS MMC snapin (step 1.6), we’ll addC:\phpwebs\wordpressas a virtual directory and allow ‘Read’ and ‘Execute’ permissions.If the database and
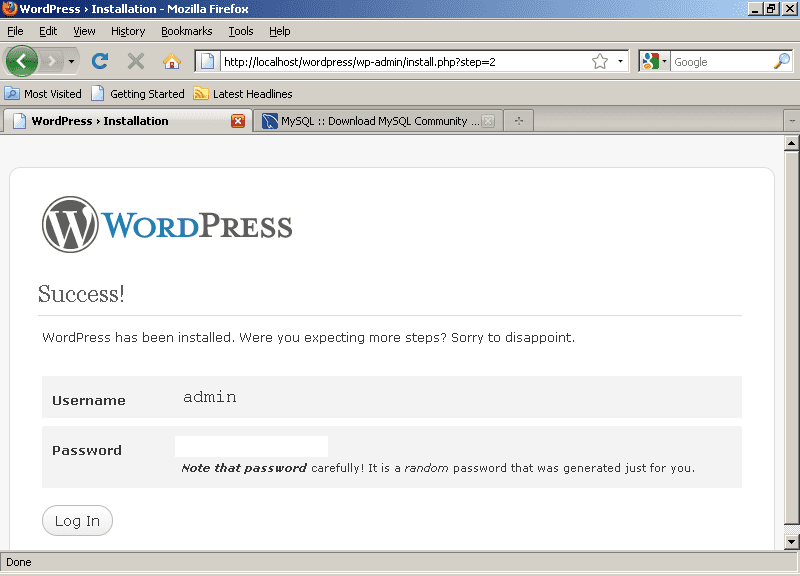
wp-config.phphave been set up correctly, navigating tohttp://localhost/wordpressshould present a Wordpress page asking you for a blog title and admin email address. When you click next you should be presented with a ‘Success!’ web page like the following: Make sure you take note of the strong password that is created!
Log in, enter ‘admin’ and the strong password you were presented with and you should reach the dashboard where you can change the password to something more memorable…
And that’s it, bar one thing…
One last thing… pretty permalinks
Wordpress uses .htaccess rules (from the Apache web server world) in order to achieve its pretty permalinks. Under IIS, you can enable pretty permalinks (Wordpress dashboard->Settings->Permalinks) as long as the permalink has index.php as part of the permalink scheme. If you don’t keep the index.php, you will run into 404 errors whenever you try to navigate to a post or page. I wanted to get around needing index.php (for an extra dash of search engine friendliness) and there are many many articles on http://codex.wordpress.org/Using_Permalinks#Permalinks_without_mod_rewrite showing you how you can acheive this, including Microsoft’s own URL rewriter, which unfortunately only works with IIS 7+ (Vista/Server 2008 and up).
I had the most success with the following:
- Download wp_url_rewriting ISAPI filter from http://www.deanlee.cn/wordpress/url-rewriting-for-wordpress-under-iis/ (currently at version 2.1)
- Register
wp-url-rewriting.dllas an ISAPI filter within the IIS Management snapin. Right click on ‘Default Web Site’ and select the ISAPI filters tab, click ‘Add’, type in a filter name (I like WP Rewriter) and browse for the wp-url-rewrite.dll. - Click ‘Apply’ and then restart IIS.
- Check the status of the ISAPI filter, if it hasn’t been loaded you may need to install the VC++ 2005 Redistributable from http://www.microsoft.com/downloads/details.aspx?displaylang=en&FamilyID=32BC1BEE-A3F9-4C13-9C99-220B62A191EE, then try restarting IIS once more. This was the case with my virgin Server 2003 SP2 install.
- You should now be able to navigate to your wordpress admin dashboard and remove the index.php from your custom permalink structure: all pages/posts should now be accessible but without the requirement of
index.php. - The only slight issue I’ve noticed is a double hit when you go to
/wp-adminwith the ISAPI filter enabled.
So there you have it, Wordpress on IIS, with any custom permalink structure you fancy.